Company services
Most services require you to have completed your Onboarding process.
Company email
Section titled “Company email”Your username will be assigned by a d-centralize admin.
- Company email account
- {username}@d-centralize.nl
- Receive email through
imap.d-centralize.nl(TLS/SSL, port 993)- Send email through
smtp.d-centralize.nl(TLS, port 587)- Webmail
- https://mail.d-centralize.nl/SOGo/
Company emails and aliases are listed in the company data wiki.
Other domains
Section titled “Other domains”When communicating with clients, it could be useful to have extra email
addresses on different domains. For example, username@itslanguage.nl.
Use the same IMAP and SMTP host names as for the company email mentioned above.
These extra email addresses are an alias of your primary email address, so you’ll receive everything in one inbox. This is the default: if you prefer you can have it separated.
Scam and phishing emails
Section titled “Scam and phishing emails”Sometimes you might receive an email that looks like it originates from
@d-centralize.nl, only for it to come from a malicious actor. If you
suspect something is fishy, check the sender’s email address to make
sure it actually comes from the person they claim to be. A general rule
of thumb is that people from d-centralize will send emails using their
@d-centralize.nl email address. If in doubt, contact the person in
question to verify the email using a channel which is not email, like
Mattermost.
Read more on how to recognize phishing emails: Phishing (Dutch Government)
Obviously you should not click any links in the email or reply to it. Just flag the email as junk/spam if your email client supports it, and delete it.
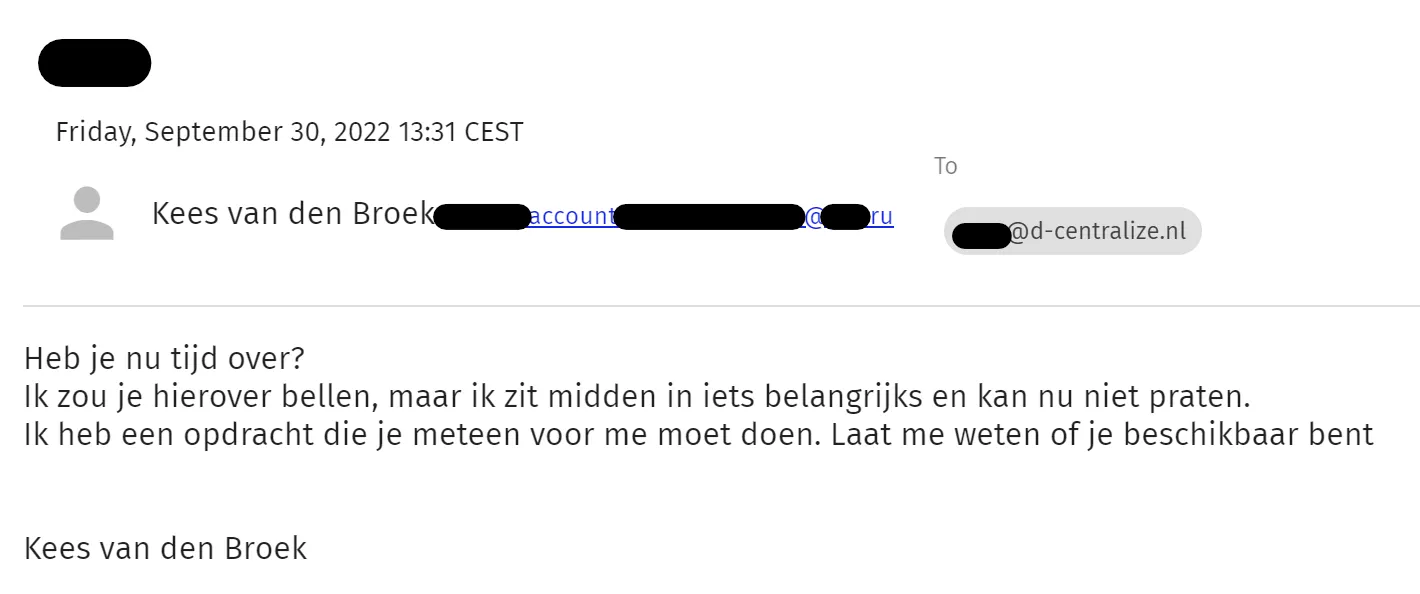
English transcription:
“Do you have some time now? I’d call you about it, but I’m in the middle of something important and can’t talk right now. I have an assignment that you must do for me right away. Let me know if you’re available”
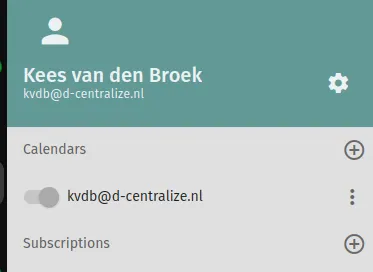
Calendaring
Section titled “Calendaring”If you’d also like to use the calendar and contacts. You can use them through the above webmail portal as well as using the following links for use in other applications:
- CalDAV - https://mail.d-centralize.nl/SOGo/dav/username@d-centralize.nl/Calendar/personal/
- CardDAV - https://mail.d-centralize.nl/SOGo/dav/username@d-centralize.nl/Contacts/personal/
Sharing
Section titled “Sharing”You can see and subscribe to the calendar of a co-worker from webmail.
Login, load your calendar and locate the + button next to Subscriptions. Click it and select a co-workers’ agenda.
File sharing
Section titled “File sharing”Our next server provides a personal folder to store files. It also provides access to shared project folders. Both can be accessed through:
- The web: https://next.d-centralize.nl/apps/files/ (to log in, use the button: “Log in with dcentralize SSO”)
- Through a WebDAV share: davs://next.d-centralize.nl/remote.php/dav/files/<username>
If you access these files a lot, spend a bit of time making a permanent connection from your OS.
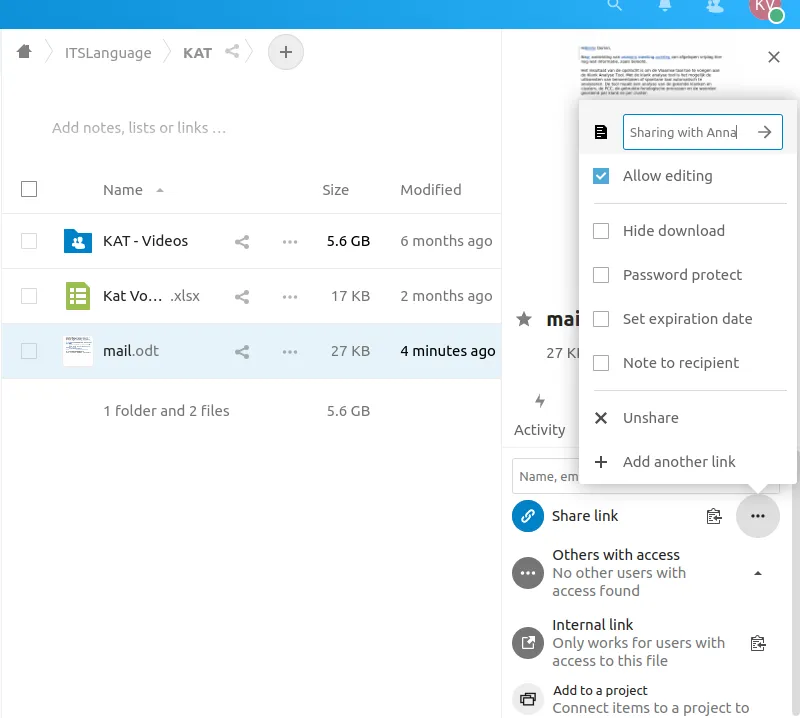
Sharing outside the organization
Section titled “Sharing outside the organization”Through the web interface of our next server, files and folders can be shared with people outside our organization for collaboration efforts.
- Select the share properties of a file or folder.
- Click the three dots left of “Share link”.
- If you want the person you’re about to share with to edit, tick the “Allow editing” box.
- Fill in a note on top (the person and/or reason you’re sharing). That’s for ourselves to be able to get an overview of what content is shared out of the organization. Click the right arrow to finalize.
- Now click the copy icon right of “Share link (Sharing with Anna)”.
- Paste the link into an incognito browser window to test out if this is how you’d like the user to share with sees it.
- Send that link to the user to share with.
Credentials
Section titled “Credentials”Many services allow individual login accounts with roles. However, there are still cases where shared credentials are the only way to distribute access within the team. When invited by an admin, you can join our Vaultwarden service.
Team communication
Section titled “Team communication”Instant Messaging
Section titled “Instant Messaging”Mattermost
Section titled “Mattermost”Mattermost is our primary team communication tool where you can also
meet your remote working colleagues. Aside from the general team
(dcentralize), a project specific team can be joined for project
specific communication. Also, bots post relevant messages here. Join
through Mattermost by signing in
with your d-centralize Gitlab SSO account.
Mattermost is chosen because of its open source codebase and default (but optional) coupling with Gitlab.
Mobile and desktop apps can be downloaded here.
Ubuntu installation instructions:
curl -fsS -o- https://deb.packages.mattermost.com/setup-repo.sh | sudo bashsudo apt install mattermost-desktopInstructions on logging into a self-hosted Mattermost server here.
Inviting guests
Section titled “Inviting guests”The External team in Mattermost is designated to invite guests outside our organization.
For new topics, create a new channel of type Private channel. Next click the
button Add members to this private channel and invite them through email or send them the invitation link.
Please archive channels once they’re no longer in use.
Discord
Section titled “Discord”The Appsemble team uses Discord which is convenient to join for external guests: (Appsemble).
IM Bridge
Section titled “IM Bridge”It’s convenient to have a wormhole for messages to travel from Mattermost to
Discord and vice versa.
That’s the #bridge channel on Mattermost and #mattermost-bridge on Discord.
Video conferencing
Section titled “Video conferencing”Besides having textual conversations with your coworkers, having video calls is also very convenient way to also see each other. We use Jitsi to have our video conferences.
To invite coworkers or clients for a conference call, you can create a new conference room and share it.
When in doubt if you have audio/video problems, just check your setup with the echo server
Regular VPN
Section titled “Regular VPN”We maintain a VPN subscription from a commercial VPN provider for several uses:
- For employees working outside the Netherlands who need to appear as Dutch for security reasons while working on client projects.
- For deliberately obtaining a remote presence to test out regional differences in our SaaS.
Installing this browser extension makes it easy to use.
Company VPN
Section titled “Company VPN”Some of our internal services are locked to a set of IP addresses for access. In case you’re working remotely your traffic is rerouted through the office router.
To use the company VPN, you have to configure your device to create a WireGuard VPN tunnel.
Linux (Ubuntu)
Section titled “Linux (Ubuntu)”-
Open your Terminal and install WireGuard apt package:
Terminal window sudo apt install wireguard -
Download the
vpn.conffile your admin provides you.
Now choose either GUI or CLI config:
GUI config
Section titled “GUI config”-
Open NetworkManager
-
Add VPN
-
Import from file
-
Select
vpn.conf -
Add
-
Check if the tunnel is working. Go to a website showing your current IP. e.g.,
- https://checkip.amazonaws.com/,
- https://whatismyip.com/,
- https://ipleak.net/.
If your IP is equal to
185.184.111.56and the Country isThe Netherlands, then you are definitely connected to the VPN.
CLI config
Section titled “CLI config”- Copy it to
/etc/wireguard/.
sudo cp vpn.conf /etc/wireguard/- Activate the tunnel and your internet traffic will be rerouted through the company router
sudo wg-quick up vpn-
If you want to deactivate the tunnel, you can use the following command:
Terminal window sudo wg-quick down vpn -
Check if the tunnel is working. If the tunnel is working, you are going to see a new property in section
peercalledlatest handshake. This property will have a value representing the time of the latest handshake.
sudo wg showWindows / Mac
Section titled “Windows / Mac”-
Download the WireGuard app through the WireGuard website and install it
-
Download the `vpn.conf“ file your admin provides you and place it in on your harddrive
-
Open the WireGuard App, click on
Add tunneland import thevpn.conffile -
Type a name and the WireGuard tunnel will be created
-
Activate the tunnel via the Activate button and your internet traffic will be rerouted through the company router
To deactivate, please use the Deactivate button and your WireGuard tunnel connection will be turned off.
-
Check if the tunnel is working
- Option 1: If the tunnel is working, you are going to see a new property in section
Peercalled Latest handshake with value representing the time of thelatest handshake. - Option 2: Go to a website showing your current IP.
e.g., https://checkip.amazonaws.com/, https://whatismyipaddress.com/, https://ipleak.net/. If your IP is
equal to
185.184.111.56and the Country isThe Netherlands, then you are definitely connected to the VPN.
- Option 1: If the tunnel is working, you are going to see a new property in section
When developing on WSL, you have to follow the Windows instructions to install WireGuard and create a vpn.conf file.
- Follow the Windows instructions to install WireGuard and create a vpn.conf file
Android
Section titled “Android”-
Download the WireGuard app from the Google Play Store and install it
-
Scan the VPN configuration through the QR code your admin provides you
-
Type a name and the WireGuard tunnel will be created
-
Activate the tunnel via the toggle button and your internet traffic will be rerouted through the company router
To deactivate, please use the toggle button and your WireGuard tunnel connection will be turned off.
-
Check if the tunnel is working
-
Option 1: If the tunnel is working, you are going to see a new property in section
Peercalled Latest handshake with value representing the time of thelatest handshake. -
Option 2: Go to a website showing your current IP. e.g., https://checkip.amazonaws.com/, https://whatismyipaddress.com/, https://ipleak.net/. If your IP is equal to
185.184.111.56and the Country isThe Netherlands, then you are definitely connected to the VPN.
-
Example vpn.conf file
Section titled “Example vpn.conf file”[Interface]PrivateKey = <Client-PrivateKey>Address = <IPv4 address>,<IPv6 address>DNS = <DNS address>
[Peer]PublicKey = <Public key of WireGuard interface>PresharedKey = <Client-PresharedKey>Endpoint = <Public IP of the system>AllowedIPs = <IPv4 address>, <IPv6 address>Advanced: Split Tunnel (Linux)
Section titled “Advanced: Split Tunnel (Linux)”By default, the company VPN routes all traffic through the office. If you want to keep the VPN always active but only route office traffic through it (split tunnel), you can use a NetworkManager dispatcher script.
How it works:
- Disables automatic peer routes (prevents default route from being added)
- When the VPN connects, the script fetches the route configuration
- It adds routes only for office resources (subnets and hostnames)
Installation:
Download and install the dispatcher script:
curl -o /tmp/99-wg0-split-tunnel https://handbook.d-centralize.nl/vpn/99-wg0-split-tunnel.shsudo mv /tmp/99-wg0-split-tunnel /etc/NetworkManager/dispatcher.d/sudo chmod +x /etc/NetworkManager/dispatcher.d/99-wg0-split-tunnelDisable automatic peer routes and enable autoconnect:
nmcli connection modify wg0 wireguard.peer-routes nonmcli connection modify wg0 connection.autoconnect yesReconnect to apply:
nmcli connection down wg0 && nmcli connection up wg0Verify:
# Should show your real IP (not VPN):curl ifconfig.me
# Should work (routed via VPN):ping 192.168.2.10
Check logs: journalctl -t wg0-split-tunnel
Software development
Section titled “Software development”GitLab
Section titled “GitLab”Project planning, issue tracking, code, CI is all kept in our gitlab. To join, create your personal GitLab login and ask a colleague to grant you access to the appropriate projects. Also see Git for further setup instructions.
Sentry
Section titled “Sentry”Sentry is the tool for “Application Performance Monitoring & Error Tracking”. Basically, if something crashes in production, the stack trace to investigate can be obtained there.
Weblate
Section titled “Weblate”Weblate is the tool for translating strings within a project.
It can be configured to automatically provide translations (using APIs to services like DeepL) but also allows manual
translations and general linting of language specific oddities.
An initial setup per project is needed.
Depending on the configuration, it usually monitors changes in the main branch.
It can then automatically translate source strings into several preconfigured target languages and provide a new MR
using the translations branch Weblate maintains.
Plausible
Section titled “Plausible”Plausible is our self-hosted “easy to use and privacy-friendly Google Analytics alternative.”
Information on shared company infrastructure (GitLab runners, router and such) is kept in the infra repo and is also available infra rendered.
Gitlab runners
Section titled “Gitlab runners”We’ve got several (6 at the end of 2025) Gitlab runners available for running Gitlab jobs in Docker. You can define tags in a job to direct the job to any or a specific machine.
- No tags: Gitlab will prioritize a Gitlab hosted runner over our private runners.
saas-linux-small-amd64: Gitlab will only run the job on a hosted runner.dcentralize: Gitlab will only run the job on any of our private runners.sole-occupant: Gitlab will only run the job on any of our private runners that have a job limit per server of to 1. (3 runners at the end of 2025 are capped like this).
Cuda dev machines
Section titled “Cuda dev machines”There are 2 machines available for these situations:
-
When you laptop doesn’t have a GPU and you need that.
-
You have a long running task.
-
You need more memory or storage than your laptop supplies.
-
To access, ask an admin for a shell account. You get sudo (root) rights. You can only access the server from the office or from within the company VPN.
ssh 192.168.2.25 (cuda-dev, 32GB mem) or ssh 192.168.2.26 (cuda-dev2 64GB mem).
S3 storage
Section titled “S3 storage”We have several S3 buckets in Hetzner. To be used for backups, storing application data. To browse the contents of it:
S3_REMOTE_STORAGE_URL=fsn1.your-objectstorage.comS3_ACCESS_KEY_ID=<key>S3_SECRET_ACCESS_KEY=<secret>S3_BUCKET="<bucket name>"S3_CONFIG_NAME="hetzner-s3"rclone config create $S3_CONFIG_NAME s3 url $S3_REMOTE_STORAGE_URL vendor other access_key_id $S3_ACCESS_KEY_ID endpoint $S3_REMOTE_STORAGE_URL secret_access_key $S3_SECRET_ACCESS_KEY provider OtherThen to list all files in bucket:
rclone ls $S3_CONFIG_NAME:$S3_BUCKETOr serve a webserver so you can browse buckets and files in browser:
rclone serve http $S3_CONFIG_NAME: --addr :8080 --read-onlysensible-browser http://localhost:8080/Warning
Section titled “Warning”Don’t expect the server to be behaving well. There are several users on the machine, they all have root access so things can be messed up easily. Make sure you treat it as an experimental system and keep valuable data backed up elsewhere.