OS X
This document describes how to set up an OS X machine for development.
Apple Silicon
Section titled “Apple Silicon”Apple has begun transitioning its lineup from Intel-based Macs to Apple Silicon based Macs.
If you’re using a Mac with an M-series chip, such as M1, M2, M2 Pro, et cetera, you will need to install Rosetta 2 in order to make use of some of the tools listed below, as some were originally built for a different architecture ( x86-64/amd64 vs. arm64).
To install Rosetta 2, run the following command in Terminal:
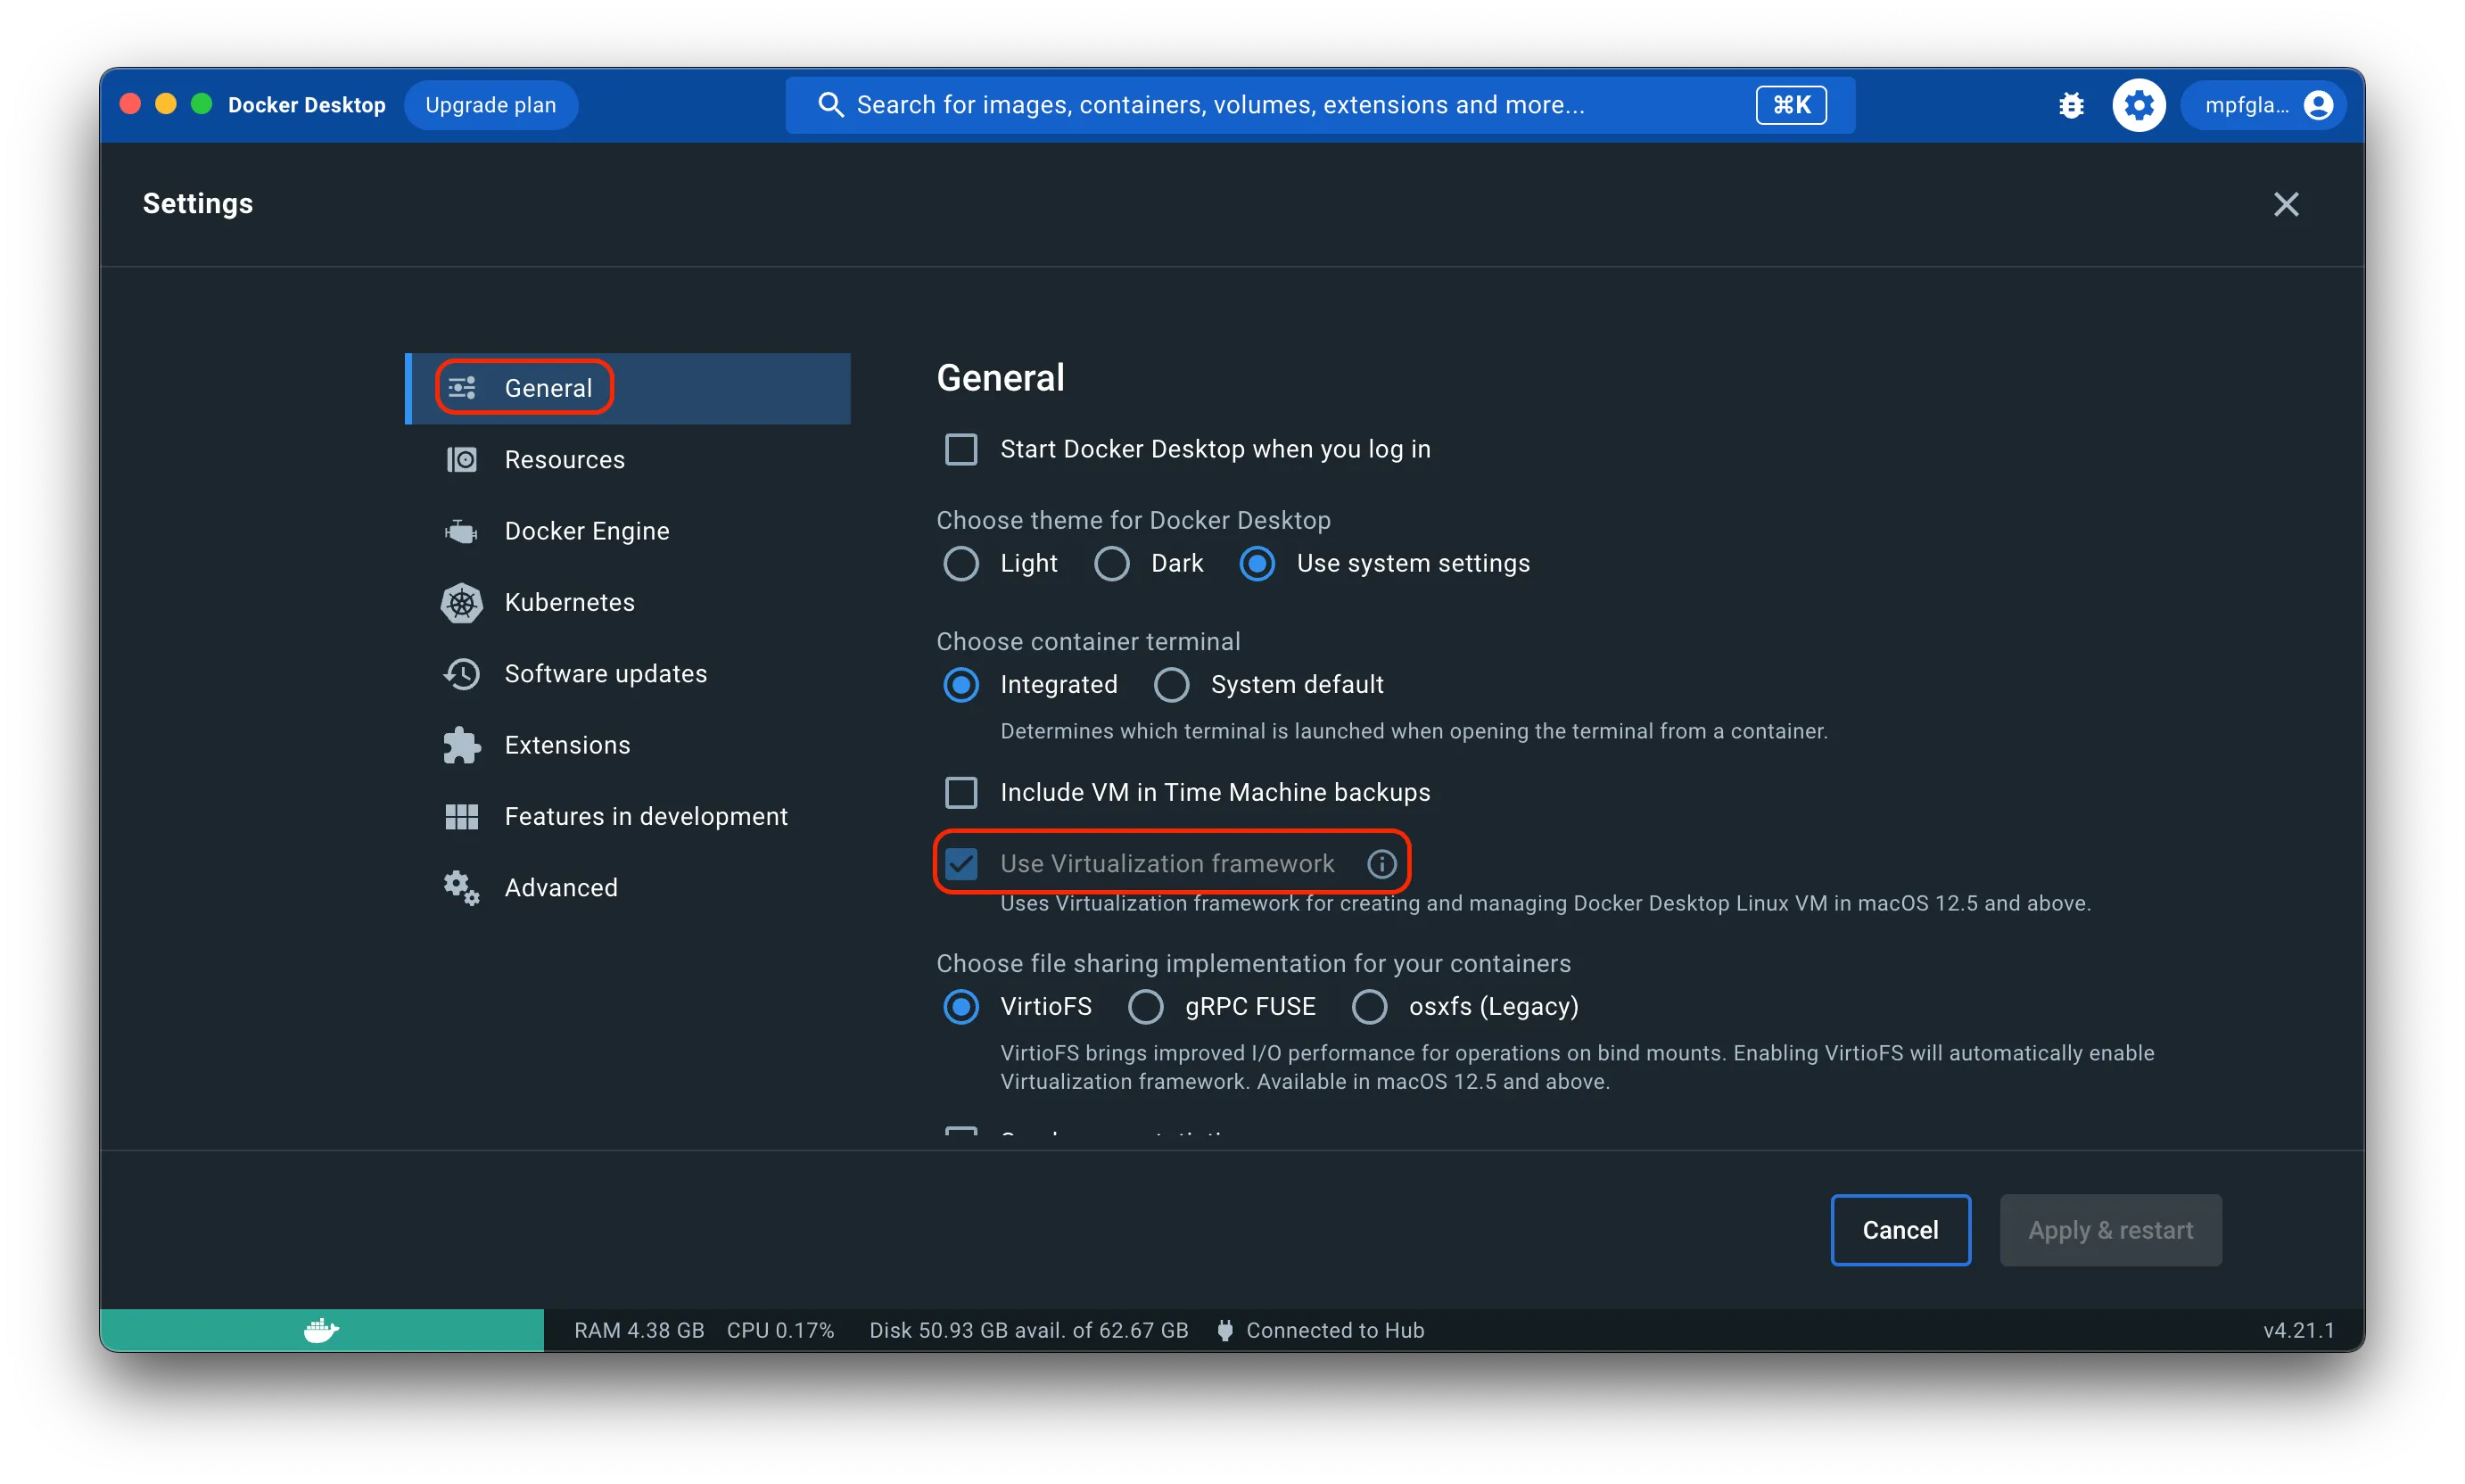
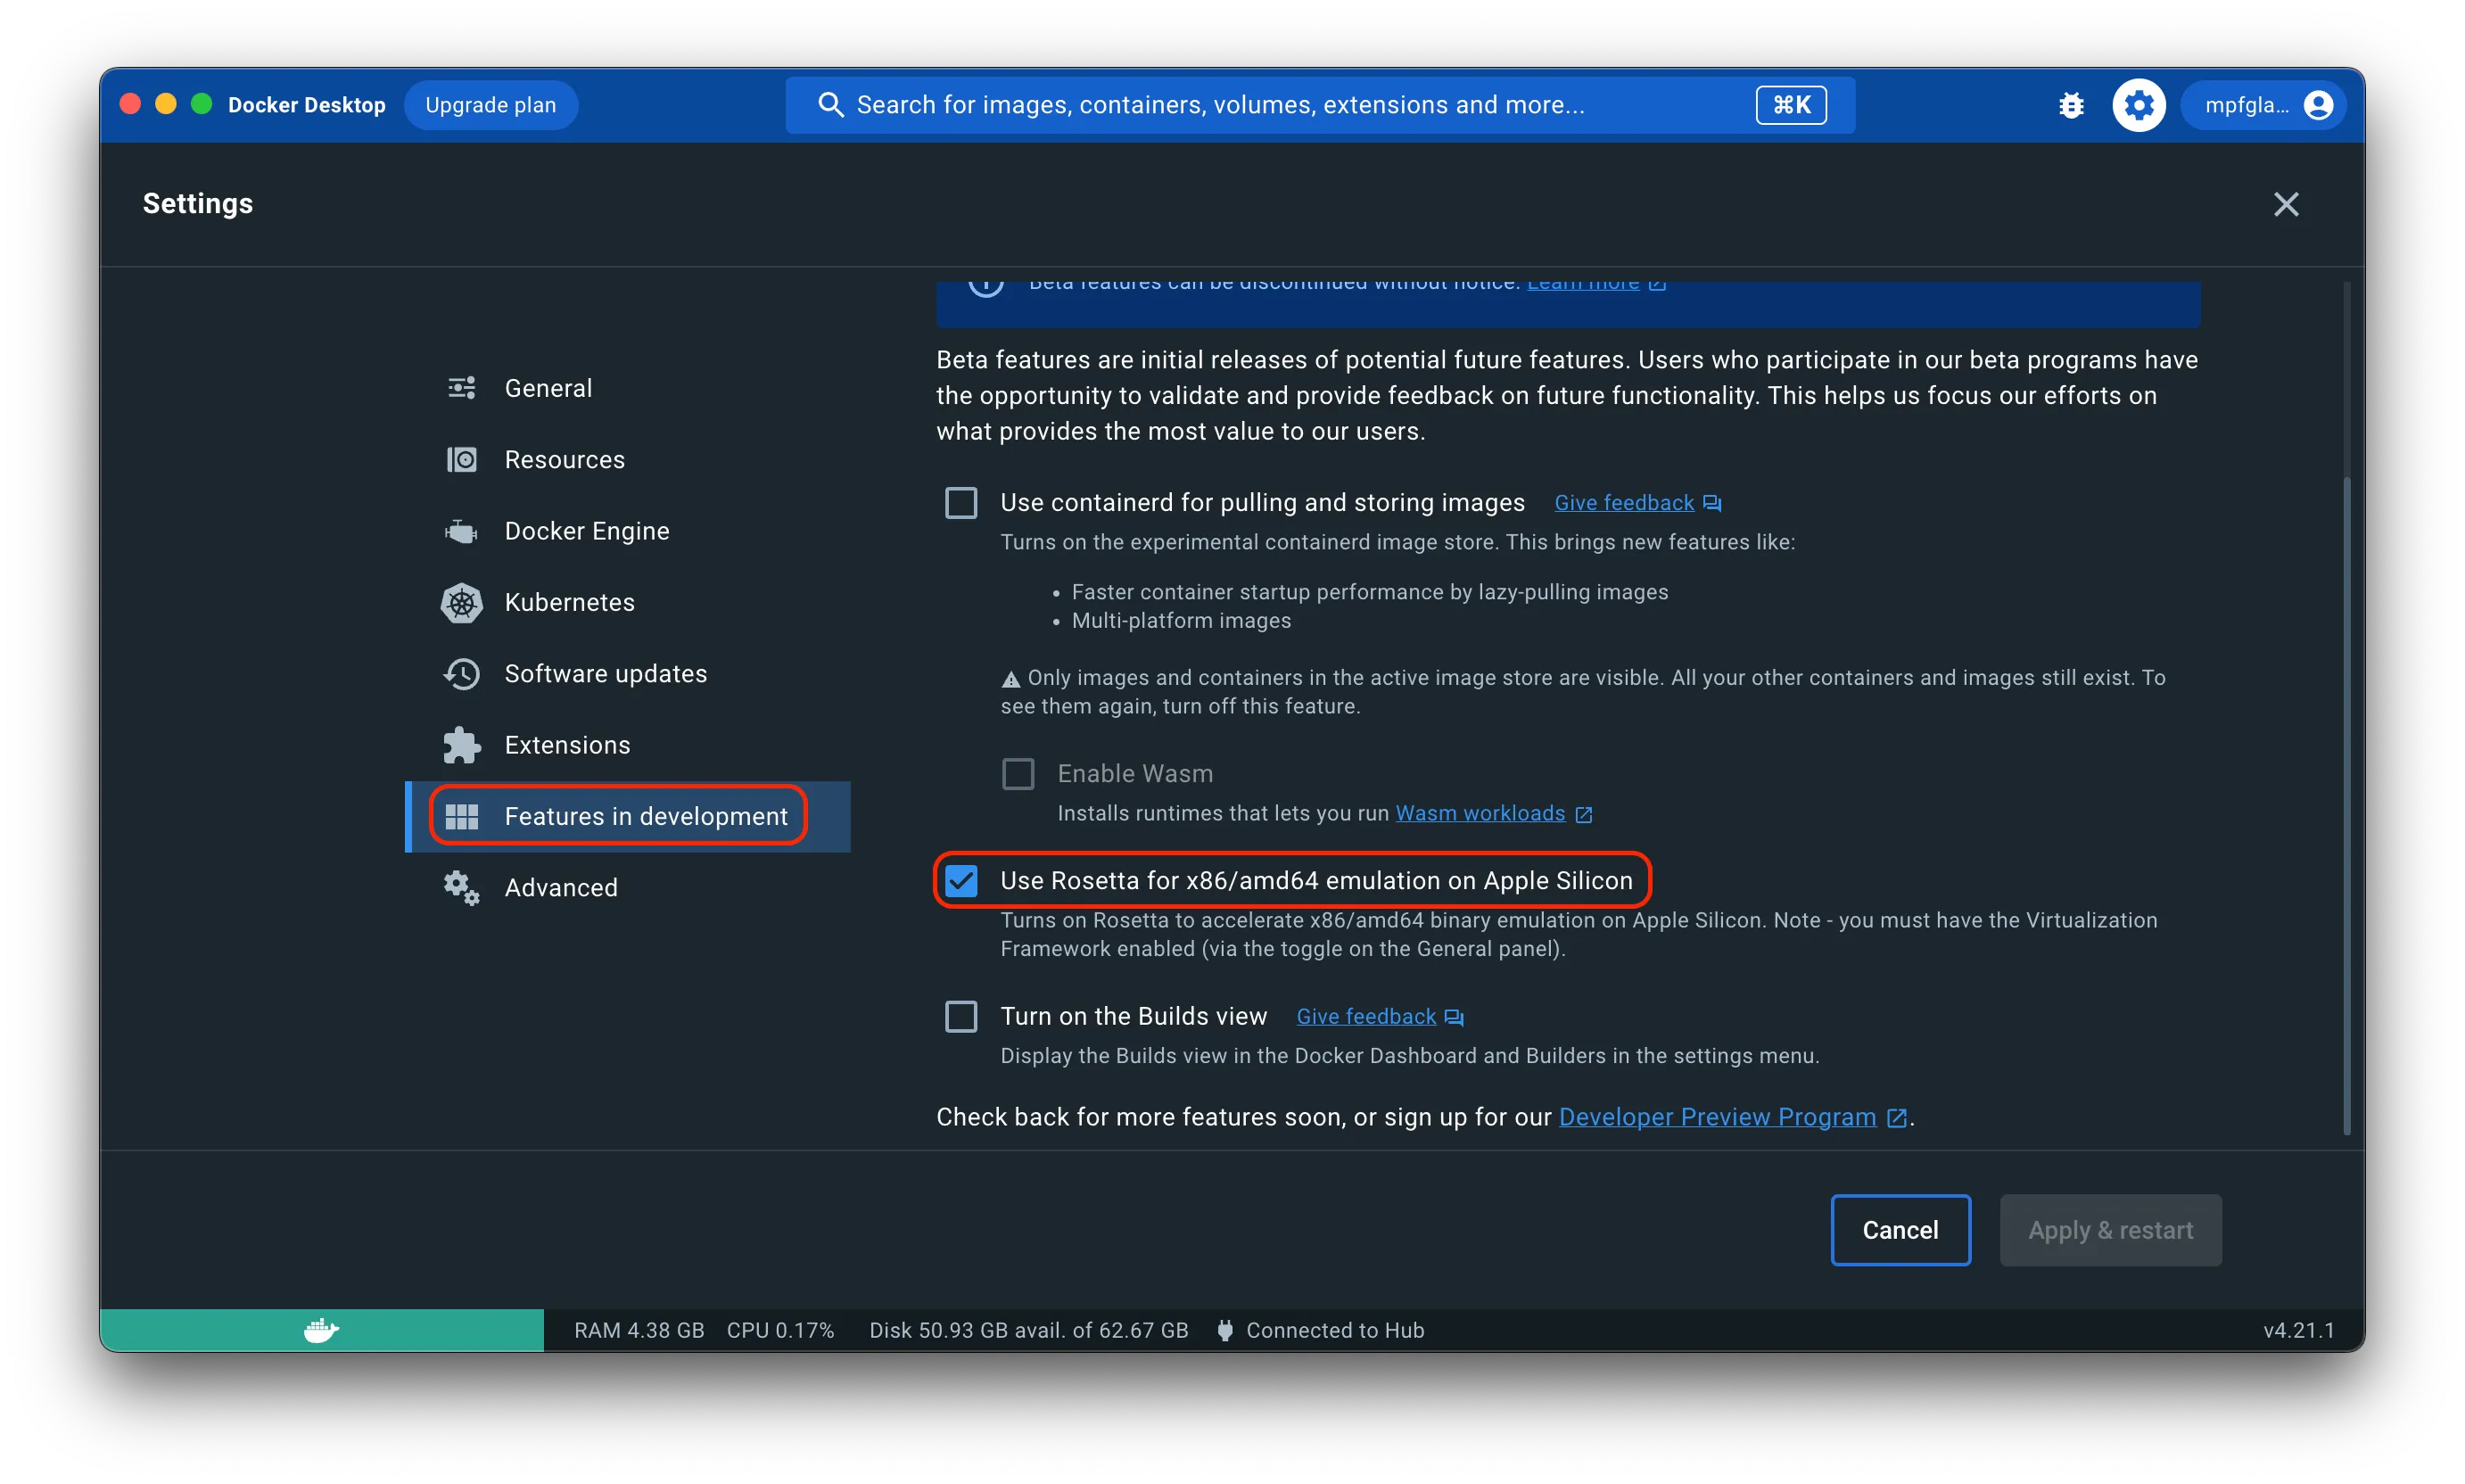
softwareupdate --install-rosettaMost programs will run fine now, though you might need to configure some programs to specifically use Rosetta 2. An example of this is Docker Desktop:
Nearly all Docker images will run fine now, even if they were originally built for x86-64/amd64.
You might run into some issues with images that run Python, though.
To run those images, you need to specify the architecture platform:
docker run --platform linux/amd64 <image>This works fine for running an image incidentally, but if you want to use Docker Compose, you need to specify the platform in the Dockerfile that built the image:
FROM --platform=linux/amd64 <image>This changes nothing about the image itself, other than explicitly telling Docker that the image is built for x86-64/amd64. It already saw that before, but somehow it refused to run it through Rosetta 2.
If you cannot change it yourself, consider asking the maintainer of the image to do so.
Installing Xcode
Section titled “Installing Xcode”Install Xcode through the App Store application. After the installation is completed, accept the license.
sudo xcodebuild -licenseAlso install the Xcode command line tools. Some packages may depend on this. Run the following command and follow instructions from the dialog which pops up:
xcode-select --installInstalling Brew
Section titled “Installing Brew”Read Brew and install it.
Installing Tools with Brew
Section titled “Installing Tools with Brew”You can now install the required command line programs and libraries
using brew install.
brew install bashbrew install gettextbrew link gettext --forcebrew install python3brew install antbrew install libimobiledevicebrew install libtiff libjpeg webp little-cms2 # for pillowbrew install libmagic # for python-magicNext install some graphical tools using cask.
brew install --cask google-chromebrew install --cask temurin # JDK from the Eclipse FoundationUse gem to install Bundler. This is used to
install Fastlane in an isolated
environment, which in its turn is used for iOS development.
sudo gem install bundlerUse brew to install Node.js without
npm. Then install npm manually. This
will make sure npm won’t be managed
by two package managers.
brew install node --without-npmcurl -L https://www.npmjs.com/install.sh | npm_config_prefix=/usr/local shSome tools need to be installed outside of brew
pip3 install --upgrade pip setuptoolsnpm -g install grunt-clinpm -g install gulpnpm -g install bowernpm -g install ios-deploynpm -g install ios-simAndroid
Section titled “Android”The android tools should be installed as follows:
brew install android-sdkandroid update sdk --no-ui --all --filter build-tools-23.0.3android update sdk --no-ui --all --filter platform-toolsandroid update sdk --no-ui --all --filter toolsandroid update sdk --no-ui --all --filter android-23Docker
Section titled “Docker”Installing Docker is as easy-peasy.
Simply go to the Docker for Mac, choose your type of Mac (Intel or Apple Silicon), and download the installer.
Click through the prompts on the installer and Bob’s your uncle. You can now use Docker.
Note that for Apple Silicon Macs you will need to use Rosetta 2 to run Docker Desktop. See the section on Apple Silicon above for more information. Please also note that macOS will reserve port 5000 for control center, so you will not be able to use that port for your Docker containers.
Additional tools
Section titled “Additional tools”The following tools are convenient, but not necessary.
brew install bash-completionbrew install shellcheckbrew install tmuxbrew install treepip install virtualenvSome tools are outdated by default on OSX. It’s better to install them using Homebrew.
brew install gitbrew install vim